- Home
- > Information
- > Standrad pool tile construction process and tips
Standrad pool tile construction process and tips


 |
|
|
|
|
Construction preparation
1. All base surfaces should be firm, smooth, dry, clean ,free of oil, wax-free and other debris. 2. For the oily base surface, first wash it with 10% caustic soda solution, then clean it with clean water, and wait for it to dry before proceeding to the next process. Construction process
Operating process
2. Mixing ratio of cement mortar: 50 kg of cement and 125 kg of medium sand plus appropriate amount of water. For the screed mortar to be smeared 1~3cm. ◆ Complete the screed of 1~3cm thick cement mortar by using the cement mortar with the ratio of 1~2 times. ◆ After the flat layer is dried (7 days), waterproofing slurry is used for waterproof treatment. 3. Recycle use of the dry waterproof slurry: national standard swimming pool, hotel swimming pool, water supply plant reservoir. Remarks: Due to the water pressure in the swimming pool and the heat and cold in the weather, it is easy to cause arching or even cracking between the brick and the brick. Therefore, when the tile is laid, the spacing between the brick and the brick is 10mm. Sports standard tile feature description
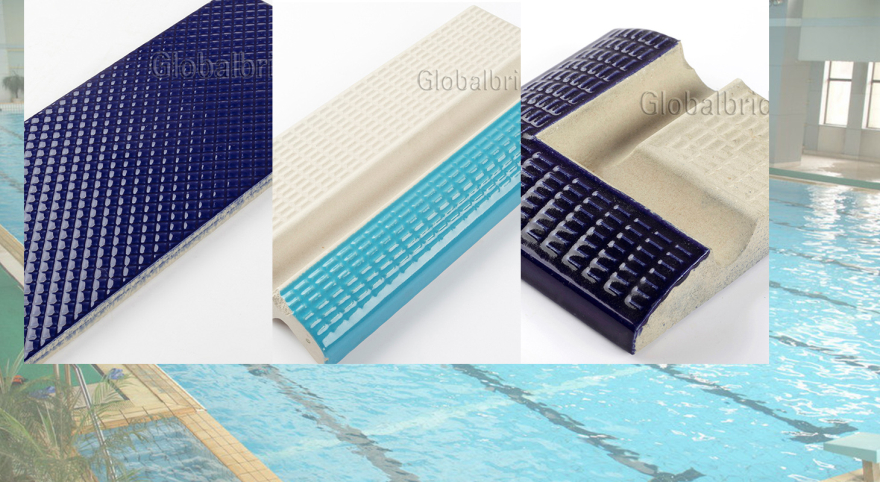
The sports standard swimming pool tile refers to the porcelain glazed ceramic tile that meets the requirements of sports psychology and has a general specification of 240MM*115MM. The product inspection standard should be in accordance with the national standard GBT4100-2006. Commonly used in China for unified verification and uniform regulations, the size is 240*115, the average water absorption rate is 0.5≤E≤3. The thickness is: 9mm ,special adhesive function, strengthening the stable and high-temperature burning of the adhesive, the special environmentally friendly ecological tile is corrosion-resistant and resistant. Grinding against corrosive water can resist cleaner erosion Pool mosaic construction method description
2. The step of sloping the wall surface is to flatten the foundation of the wall. The wall after the sloping surface must be smooth and of the same color. 3. Dash the line on the wall to record the exact position of each mosaic. Spread the 3 mosaics side by side on the floor so that the gray seam between the sticker and the sticker is the same as the gray seam in the sticker. Measure the overall width. Then use the ruler and level to measure the measured dimension vertically and horizontally on the wall to become a large square. Then divide the large square into 9 squares, and put 1 mosaic on each square. 4. Prepare the tile adhesive to prepare the tile adhesive according to the proportion. Apply the tile adhesive with the ash shovel, but the area of the smear should not exceed the area of the mosaic. First, smooth the tile adhesive with a gray shovel with a smooth edge, and then use a shovel with a jagged edge to wipe out a uniform zigzag stripe. Now, the mosaic can be prepared for the wall. 5, paving and fixing Because the mosaic is made of mesh bottom, it can be directly applied to the wall surface which has been coated with tile adhesive. Lay the mosaic vertically. Please note: the gap between the sticker and the sticker must be consistent with the gray seam of each sticker. 6. Reinforcement After each tile is positioned, tap the mosaic surface with a gray board to make it firmly attached to the wall. 7. Ensure that the gray joints are consistent. After each tiling is fixed, the gap between the bricks and the bricks must be determined to be a uniform width before starting to fill the sew. This requires relying on a small ash shovel to adjust the gray seam. This is a process that requires patience in the process of laying a mosaic, but the process of paving work is an important part. 8. The joint mixture is ready. Use a small ash shovel, evenly apply a small amount of mixed caulking agent to the mosaic surface. The small ash shovel should move diagonally, from bottom to top, then top to bottom, to ensure that all the gray seams can be completely Fill up and have no excess residue. 9. Clean the surface of the mosaic before cleaning. Prepare two buckets, one new detergent, one clean water, first soak the rag in the bucket of detergent, do not wring it out, then wipe the mosaic surface in a circular motion; then install it in the second Soak the sponge in the bucket, then wipe the mosaic surface with a sponge and wipe off any residue. Once again, wipe the surface with a sponge until it is clean. Selection of construction materials
2, the choice of waterproof materials, this construction can be purchased in the market, so consult the experienced swimming pool construction brand.
|
|
 |
|
|
Ok, today’s sharing is over. I hope everyone finds the favorite tile makes their own dream house. We will not be regular in the future. We will keep updating about the mosaic knowledge sharing, please feel free to pay attention to our official website and SNS account. Have a nice day! |
|


